
So, I’ve done something I swore I’d never do: I took a cookie decorating class.
And it was AWESOME.

Mr Tart and I love the Christmas season. We go a lil’ nuts decorating our house, inside and out, and we love to do as many “Christmassy” activities as possible.
This year, we added what’s sure to become a new tradition to our holiday “daycation” roster: taking a Christmas Cookie Decorating Class.

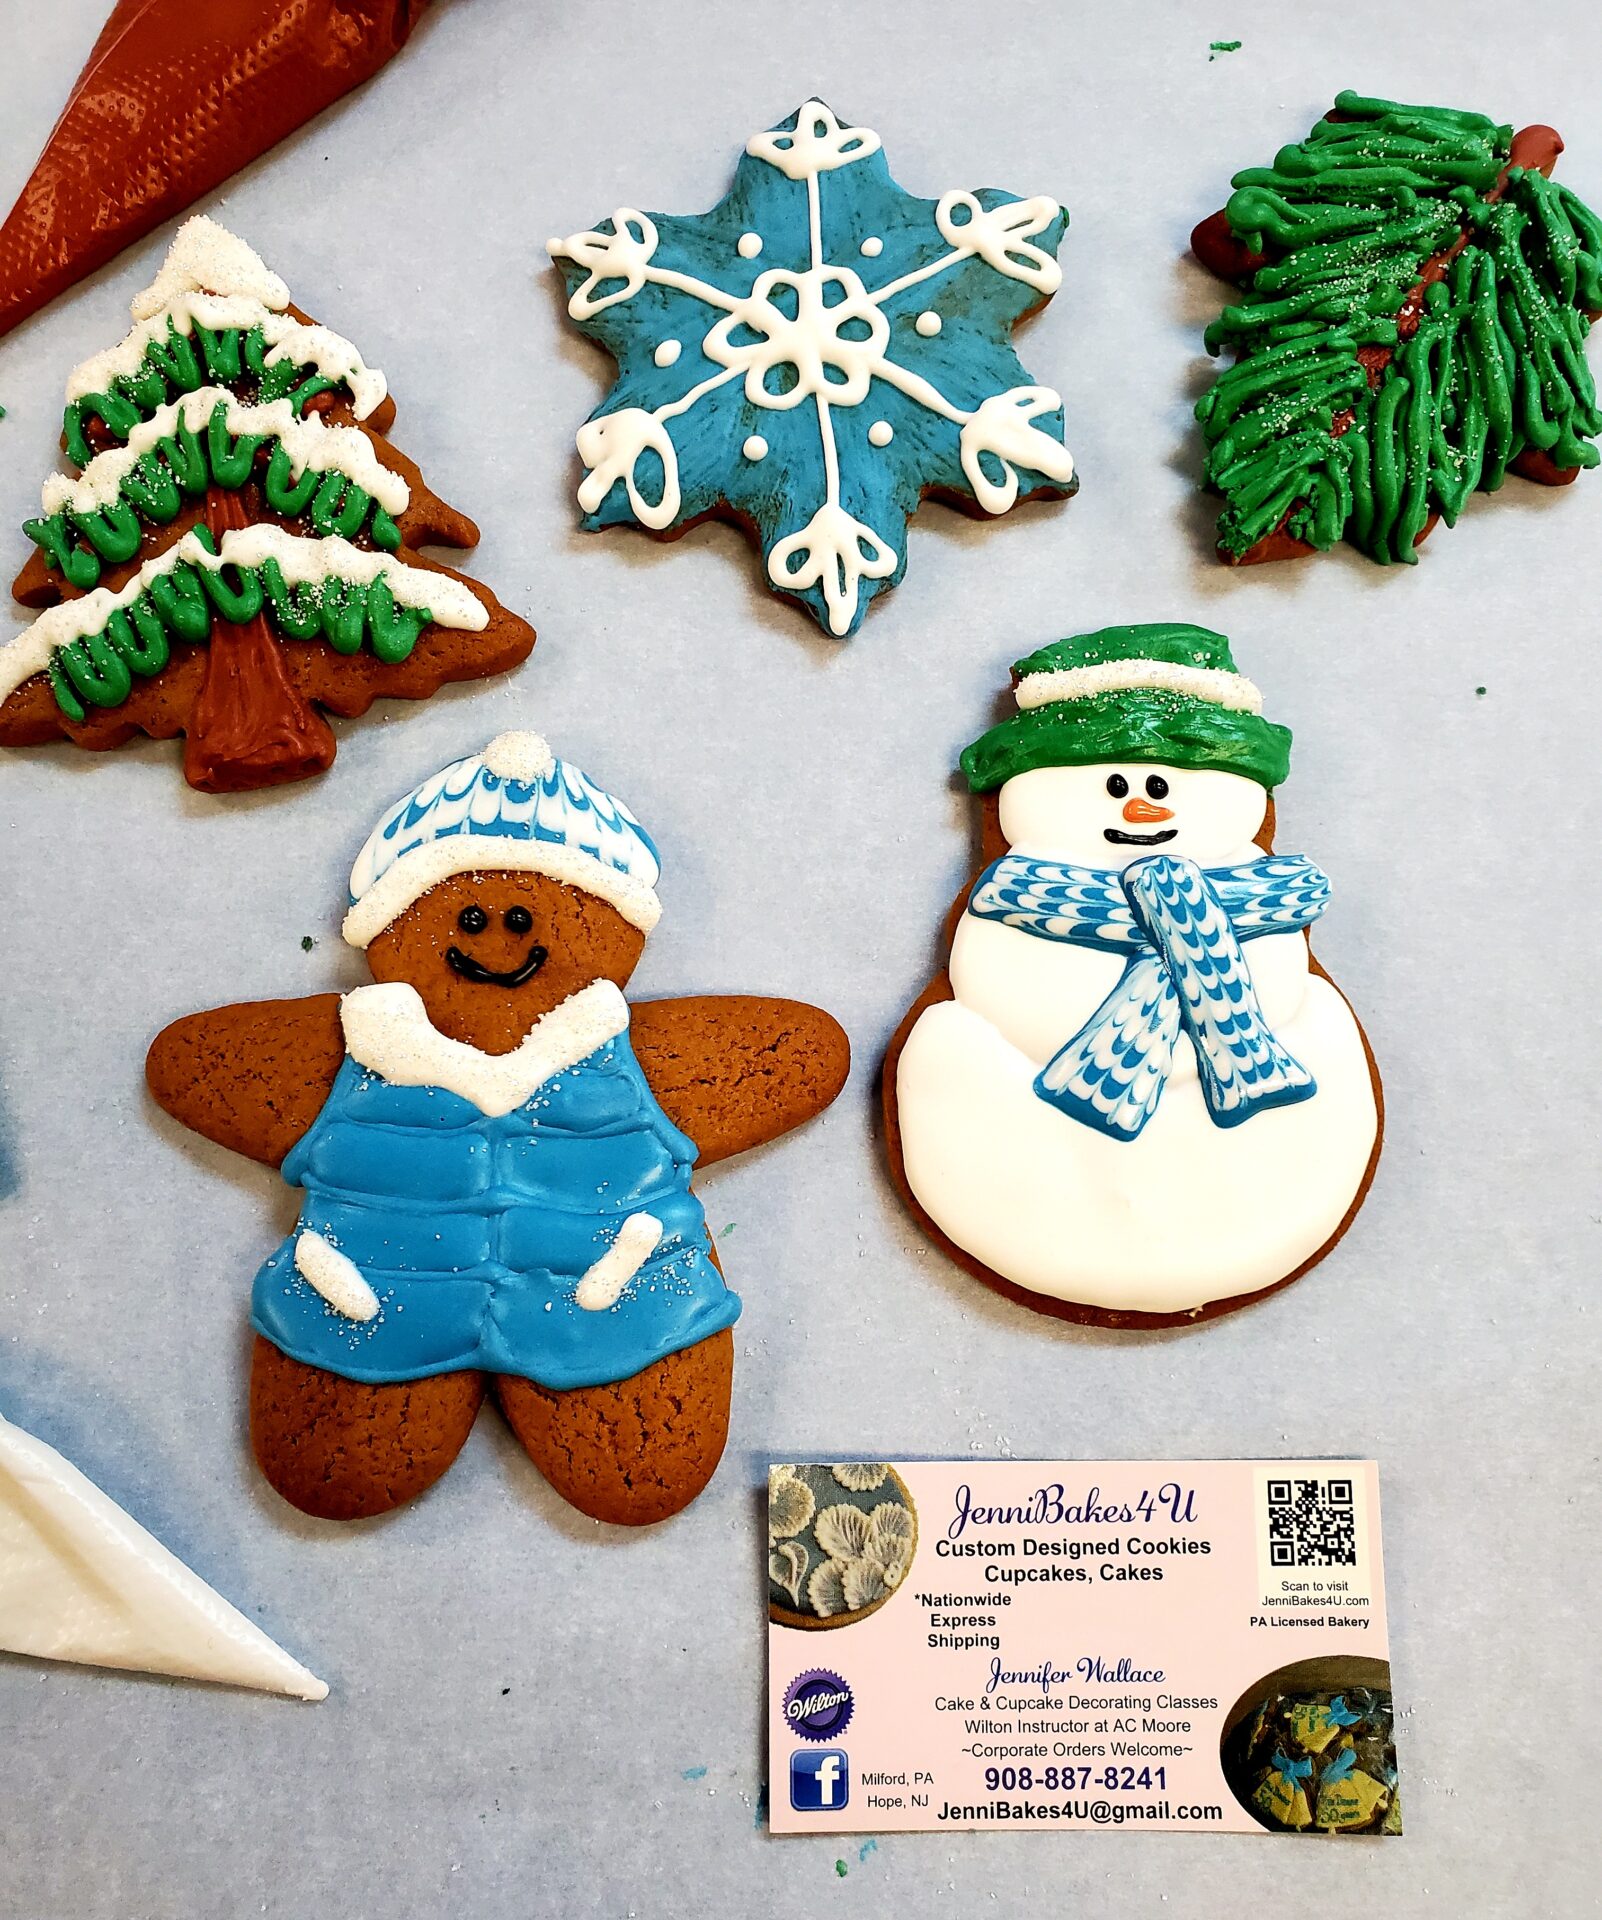
Please take a moment to appreciate the photo at the top of this post. I MADE THOSE COOKIES.
Well, I decorated them. I didn’t bake them (more on that later).
But all that royal icing piped on there? That was me. Yep.
Excuse me while I toot my own horn – toot toot! – but I didn’t think I was capable of such greatness.
And, Tartlets — if I can do this, you surely can.

A little background…
We stumbled upon this class by accident. Mr Tart and I were wandering around the Hope Christmas Craft Market, and a local bakery called JenniBakes4U had a table selling beautifully decorated gingerbread cookies.
As I was buying a sampler package of cookies, I noticed a sign advertising a cookie decorating class held in our neck of the woods at the Art Classes with Mary Shadbolt art studio.
Once we got home, broke into the cookies. They were delicious, so we jumped online and signed up for Jenni’s cookie decorating class.

I won’t lie: I was a little apprehensive about going to the class. Cookies, I can bake. I can even truss them up fairly well with sprinkles and powdered sugar to make them look a fancy enough for social media.
But, decorate cookies? Like, honest-to-goodness, Christmas Cookie Challenge-decorate cookies, with royal icing and piping bags and a buttload of patience and time?
Ehhh, not so much.

As I’ve said before, the naked cake trend is a blessing from the baking gods; I embrace minimalist decor as much as possible when it comes to desserts.
Mr Tart, however, loves cookie decorating. He has a rolling pin and piping bags and meringue powder, and a few years ago, he did pretty darn well with decorating sugar cookies for the first time.
Jenni’s cookie decorating class was mainly meant to be a birthday present for him, but we both ended up having a blast.

What makes the class so awesome?
They give you the already baked gingerbread cookies (which are DELICIOUS). They give you the royal icing, already mixed and colored and separated into piping bags.
We also got a little dish of edible glitter and other decorating accoutrements.
Literally, all you have to do is SHOW UP and decorate cookies.

We all sat around a large table, each with our own cookie station. Jenni was at the head of the table with her own sample cookes and wearing a little microhpone so we didn’t miss a word of what she said.
Jenni’d pick up a cookie and show us detail by detail what to do — what shape to make, what color to use, what to fill in (“flood)” with icing, and when to set the cookie aside and start working on the next one.
The whole cookie decorating process was pretty much idiot-proof. If you’ve taken those “paint and sip” type classes, it was along those lines of careful, step-by-step instructions.

The cookies are decorated in kind of a round-robin. We’d pipe and fill one circle of the snowman’s body, the push that cookie aside to dry. We’d pipe the stem for the Christmas tree and the pine bough, then push those aside. Pipe the hat for the gingerbread man, and push it aside.
You get the picture.

I don’t know how she did it (well, it’s probably from teaching a bajillion classes like this one), but Jenni arranged it so that each recently piped cookie was dry before we moved on piping the next, often-overlapping part.
The end result? Pretty darn professional-looking decorated cookies you’d find in a bakery.

What we learned…
Now, Mr Tart and I watch a lot of Food Network and baking competitions, so we’re pretty familiar with different cookie decorating techniques. I was pleasantly surprised to do a lot of them in this decorating class.
Of course, we learned general piping techniques – how to hold the bag, etc – as well as how to outline and flood cookies with royal icing.
We also learned some more advanced decorating techniques. For example, there’s “wet on wet,” which helped us create a patterned scarf and hat (see snowman/gingerbread cookies). There’s also a paintbrush technique that creates an easy textured background (see snowflake cookie).

We also learned how to create “layers” of texture and height in our decorated cookies.
With this technique, the snowman’s body looked like it had three separate, poofy parts. The pine bough had layers and layers of pine needles. And, white, sparkly snow actually looked like it was resting on the Christmas tree.

All the while, Jenni walked around the table and showed us her examples up close. She kept an eye on us to make no one went off the rails, and she praised our talent and originality.
While we all followed a basic design template for each cookie, she encouraged us to put our own spins on certain details.
For example, I made a very patterned snowman scarf, and I put a (sparkly!) white collar and pockets on my gingerbread man’s puffy vest.

Jenni also reminded us that our cookies didn’t need to be perfect. That pine trees and pine boughs are part of nature, so it’s fine if my pine needles are a little too large (which they were).
And, that snowmen are dressed in old, worn-out clothes that no one really wants anymore, so it’s okay if the scarf looks a little bedraggled.

The perfectionist in me greatly appreciated this encouragement and reassurance.
Under Jenni’s careful guidance, I learned just how easy it is to decorate with royal icing and how even imperfect cookies still look absolutely unique and beautiful.

Art studio owner Mary also walked around throughout the class, offering encouragement and taking photos of the cookies for social media. Overall, the whole vibe of the class was very relaxed, very positive, and very fun.
Guess how much time it took to decorate all these cookies? 1 hour and 45 minutes. Probably more like 1 h 30 minutes since we listened to a few instructions first.
That’s nothing for five beautifully decorated cookies… especially for someone who’s never decorated with royal icing before.

Jenni sent us home with our cookies in a cardboard bakery box, which made us feel very profesh. Although we could have also taken home the leftover royal icing, we decided not to.
Because it was time to EAT! As soon as we got home, Mr Tart and I feasted on our festively decorated cookies while watching Christmas Cookie Challenge (with a whole new level of admiration and respect for the cookiers).

In conclusion:
If you live in Northern New Jersey**, I highly recommend:
1) buying decorated cookies from JenniBakes4U if you have any kind of occasion coming up (**note: she ships nationwide)
2) taking any cookie decorating classes that Jenni offers.
I believe the Christmas cookie decorating classes have come to a close for the 2022 season. Jenni mentioned she’ll be offering new classes in the winter and spring, and I cannot wait. Keep an eye on her website to see when new classes will be posted!

Disclaimer: this blog post isn’t a paid advertisement. Mr Tart and I paid full price for our cookie decorating classes with JenniBakes4U at the Art Classes with Mary Shadbolt studio.
We also didn’t receive any compensation for posting about the class on the blog or social media.

I just had a REALLY NICE TIME. I’m so freaking proud of my Christmas cookies, and I wanted to share it with you all.
Thanks so much to Jenni for leading such a wonderful, fun class! And, thanks to Mary for letting us invade her space for cookie decorating, which, as she rightfully pointed out, is just another form of artistic expression.

I’m by no means a “cookier,” but now that I know some basic royal icing decorating techniques, I’m super excited to decorate my own cookies at home.
Umm, but, Jenni? Would you mind sending over 3 dozen pre-baked gingerbread cookies? Because I’ve totally been spoiled by your class and don’t want to bake the cookies myself. #kThanxBye!


Merry Christmas CJ, hope all is well.
Hi Mary! Thanks for reading, and Merry Christmas! I hope you have a wonderful holiday.